
Anyway, a couple of months ago, Lea asked the kids what they wanted to be for Halloween. Colin said that he wanted to be Thomas. So, Lea - being a good mother, and encouraging her children's dreams - said "Sure, Dada will make you a Thomas costume." And so began my project... Slowly at first. I would come home from work and Lea would say "How's Thomas coming", and I would say "Thanks for that. Has he changed his mind yet?"
Alas as we drew within three weeks of Halloween, I determined that Colin wasn't going to change his mind. So I started in earnest. First, you have to know what it is that you're going to build. So I started looking for pictures of Thomas from which I could take measurements. Eventually I found one that appeared to be serviceable and proceeded to make a measured drawing. It turned out alright, but it turns out that I failed to correct for some perspective issues in the original image.
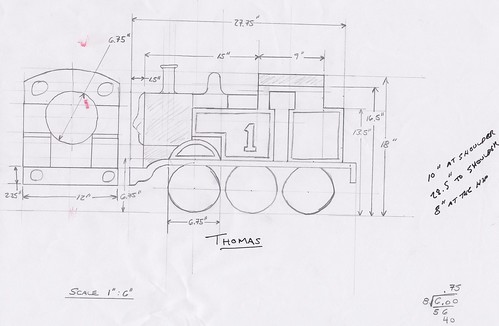
(Note some key stats for Colin on the right-hand side)
With some dimensions in hand, it was time to figure out how to implement this machine in cardboard. So it was time for some shop drawings (though the final product doesn't exactly match the dimensions on the shop drawing):
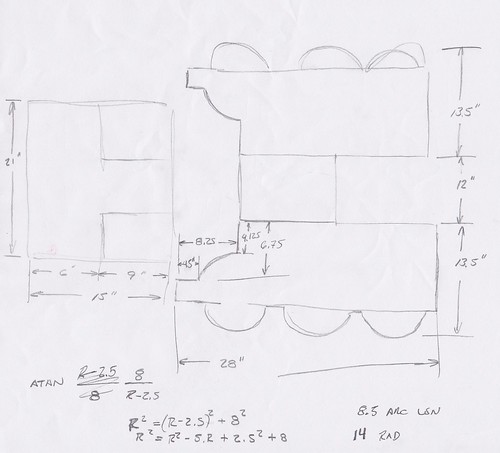
(A little math on the bottom figuring out the dimensions for Thomas's curved roof)
It was then time to start actual construction. Fortunately we have a large supply of cardboard boxes in the basement from diapers and the eventuality that we may someday move. I selected stock that had been Weasel damaged (Weasel loves to scratch cardboard boxes) and went to work cutting out the major structural elements of Thomas. Alas we have no pictures of this portion of the process.
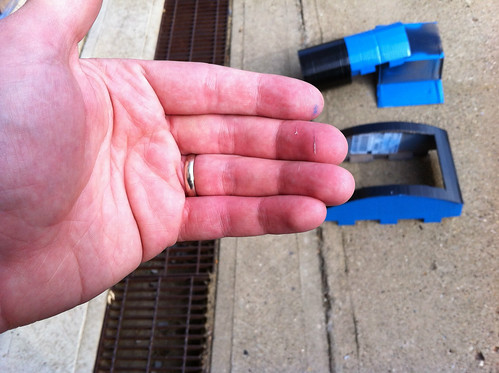
However, here's a picture of my injury from not using the right tool for the job. I was using a pair of scissors as a knife and cut myself on the blades. I didn't realize that I had cut myself, and I was looking at spots of red on the cardboard and thinking "I wonder where that came from?"
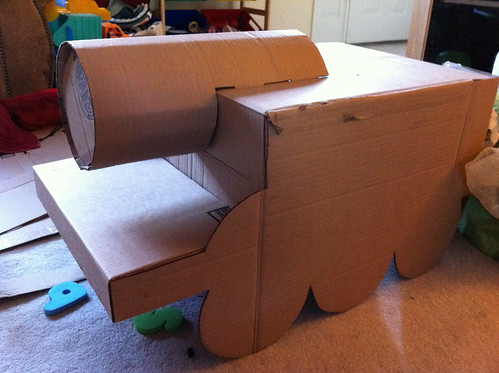
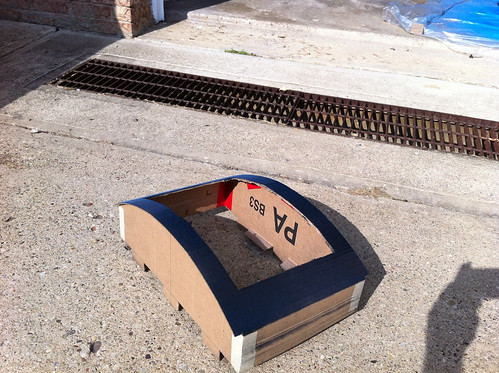
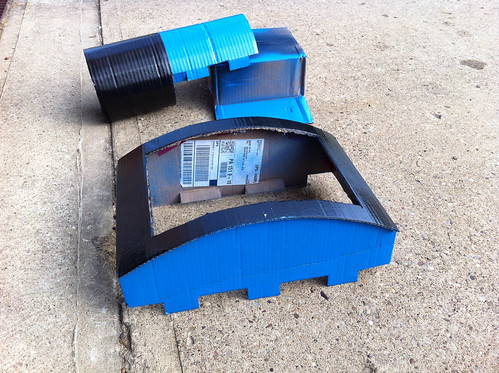
Here's a picture of two of the three major sub-assemblies:
...and Colin trying on the proto-Thomas (Colin told me that it was awesome, and it didn't even look like Thomas yet!):

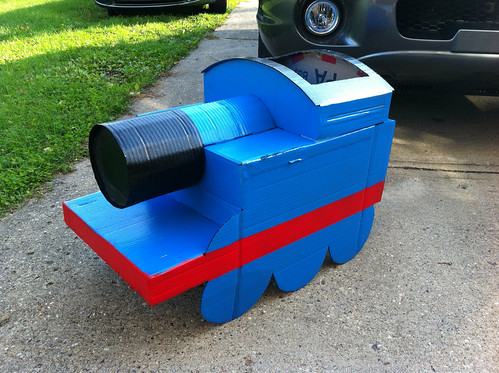
The last major sub-assembly was the roof of Thomas's cabin. I was a little concerned about how well the curved roof would turn out, but it actually turned out better than I expected (seen below in a partially painted state).
From there on out the project was mostly just painting. I hate painting with brushes, but spray paint is more fun.
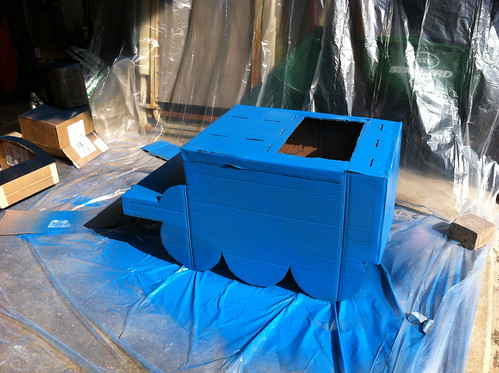
Masking components to paint multiple colors was kind of a pain...
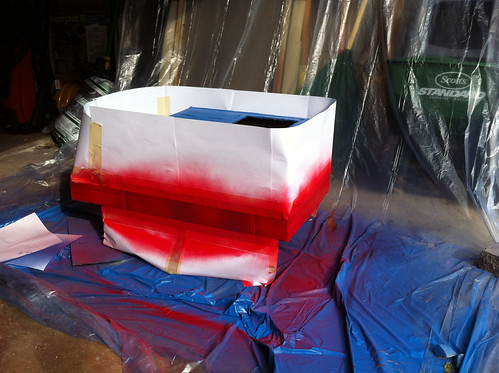
...but worth it in the end:
Thomas still needed more detailing, and I debated about whether I should paint them on or not - with the other option being to use some of the red duct tape that I had used in the construction for some of the red lines on Thomas. At the time I thought that the masking would take more time than the tape, but in retrospect, I think that the painting would have been faster. I do sincerely wish that I had painted the yellow 1's on his sides (I used yellow electrical tape). Still, he looks pretty decent (though missing a face).
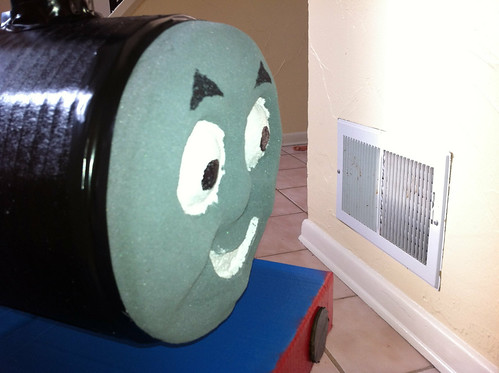
And this brings us to the final question: What to do about Thomas's face? The Thomas is pretty awesome, and very 3D, so a 3D Thomas face seems appropriate to me (and Uncle Al). Lea, however, thought that a 2D face would be fine. I just couldn't bring myself to lower my Thomas with a 2D face except as a last resort. So, I bought some floral arranging foam and proceeded to carve a 3D Thomas face.
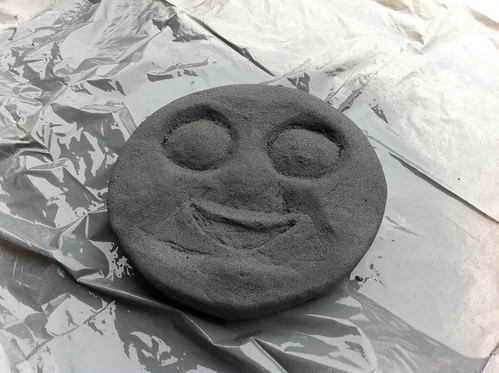
Alas, the green floral foam turned out a darker gray than I had hoped to get, but I think that it'll do.
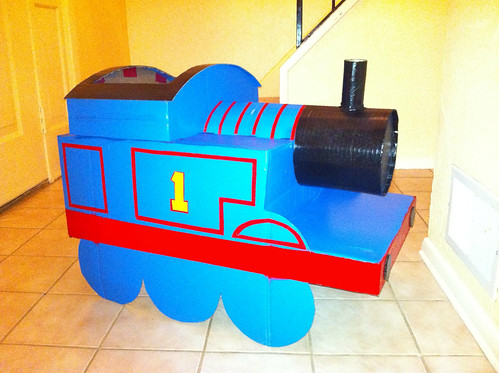
And here's the finished product:
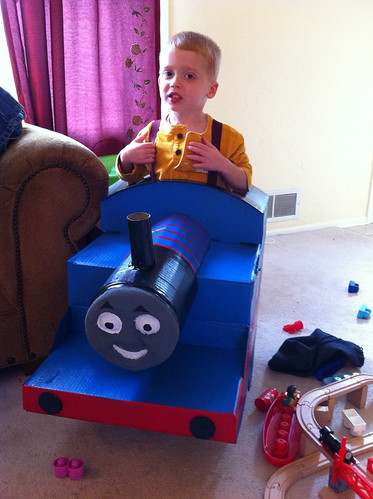
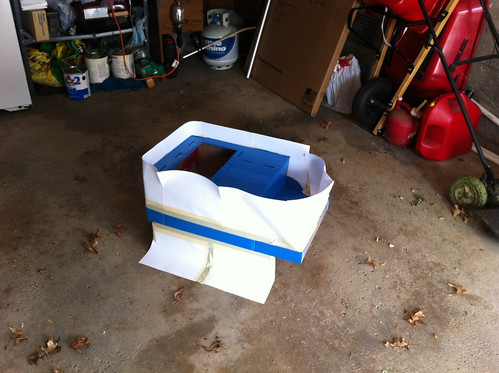
As mentioned above, I do have a few regrets... not painting the details, and here's the big one: there's a seam in one of the boxes forming Thomas's body that I forgot to tape before I painted him. If you look at the picture of the un-detailed Thomas sitting in the drive way, you'll see it. It kills me everytime that I do, but it would be a big pain to fix at this point, so I'm living with it not happily.
Also, as much as I complained during the process, I did enjoy it. I might even consider building other costumes in the future.


7 comments:
Lea, that is freaking FANTASTIC!!!!!!!! Awesome job, Mom!!!! I could never in a million years make something like that. Very, very impressive. :)
This is just too awesome. I love how detailed Michael was in his drawings and plans! And Erik and I just flew by the seat of our pants. :) I guess it's that whole right brain/left brain deal! In any case, Colin looked awesome. We had a lot of fun making the costume ourselves, too, and will most likely be making more in the future. :)
That is awesome!!! I hope Colin has lots of fun with it for weeks to come!!
:) Fairlight
Your finished product is a work of art ! Really enjoyed your description of how you made it.
Wow...that's amazing! Father of the Year Award, hands down! The kids looked great in their costumes! On a side note, if I knew your sense of humor better, I'd joke about something with your math :-) (If you really want to know, have Lea PM me.)
Yeah, I don't know why I did long division to divide 6 by 8... it was probably a long evening.
The long division gave me a good chuckle...reminded me of the time I messed up a problem on a differential equations exam with a simple multiplication mistake. At the time, I thought 4(3) was 7!
Post a Comment